If you own a vehicle, you’d already know the pain of having to bleed your brakes. It can be a long process and it’s often unclear when you are finished so there is always that fear that you may not have gotten them bled correctly. The good news is there’s an easier way to get the air out of brake lines!
If you have a vehicle that has been sitting for an extended period, your brake system will likely be filled with air. This can cause the brakes to feel soft and spongy when applied, which can result in poor braking performance.
Removing air from your braking system without bleeding requires some basic tools and supplies, such as cleaning cloths, plastic tubing, a wrench, and an empty container. You also need to have some knowledge about how hydraulic brake systems work.
This article will walk you through the steps for figuring out what is wrong with your brake system, as well as some basic troubleshooting tips that can help you remove air bubbles from your brake system without bleeding.
https://commons.wikimedia.org/wiki/File:VacuumBleeding.jpg
Jump to
- 1 Why Do Brake Lines Need to Be Bled?
- 2 How To Get Air Out of Brake Lines Without Bleeding – Step-by-Step Guide
- 2.1 Step 1: Gather the Supplies
- 2.2 Step 2: Jack Up the Car
- 2.3 Step 3: Find Bleeder Bolts
- 2.4 Step 4: Loosen Bleeder Bolts and Attach Tubing
- 2.5 Step 5: Have A Friend Apply Brakes
- 2.6 Step 6: Clean the Bleeder Bolt
- 2.7 Step 7: Replace the Old Brake Fluid with the New One
- 2.8 Step 8: Tighten and Secure the Bleeders
- 2.9 Step 9: Repeat the Process for Every Wheel
- 2.10 Step 10: Fill Your Brake Fluid Reservoir
- 2.11 Step 11: Go for A Test Drive
- 3 Tips on how not to mess up when bleeding your brakes
- 4 FAQs
- 5 Final Words
Why Do Brake Lines Need to Be Bled?
Some of the reasons why brake lines need to be bled include the following.
- Replacing old fluid with new and removing any air bubbles that may get trapped inside.
- For Diagnosing and fixing a hydraulic leak.
- You may need to bleed your brake lines if you are changing from standard metal braking lines to ceramic or nylon-coated ones. This is because the new brake lines will not be able to handle the pressure of the fluid that has built up in the old line unless it is bled out.
- If your car has been sitting for a long time and hasn’t had use of its brakes, it may have old fluid that needs to be replaced.
How To Get Air Out of Brake Lines Without Bleeding – Step-by-Step Guide
You can get the air out of brake lines without bleeding by following these steps:
Step 1: Gather the Supplies
You’ll need the following list of supplies to complete this process.
- Cleaning Cloths or Paper towels
- Rags
- Plastic tube
- A wrench
- A container to catch the old brake fluid
- Fresh brake fluid
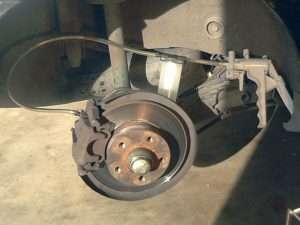
Step 2: Jack Up the Car
Jack up the car, and remove the tire and wheel. Next, you need to use a cleaning cloth or paper towel to wipe off any crud or dirt from the area where the brake lines are attached to the car. Make sure you clean thoroughly, as any dirt or grease will cause air bubbles to build up in the line.
After you wipe the dirt from the area clean, you will need to dry it. You can either use a clean cloth or compressed air.
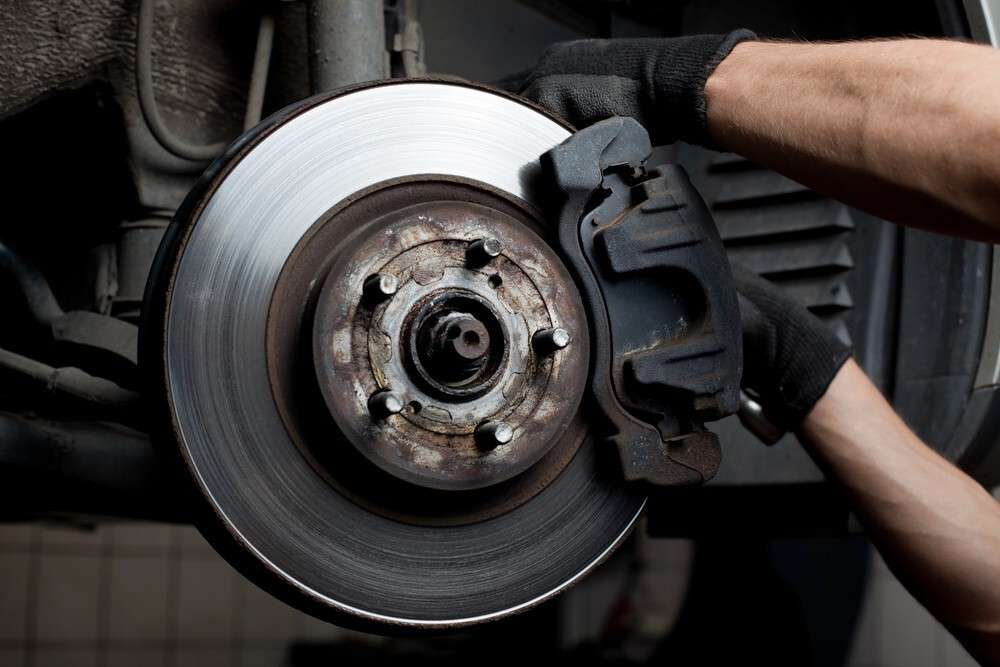
Step 3: Find Bleeder Bolts
You will need to find the bleeder bolt. This is a long cylindrical plug located at one end of your brake calipers. It is used to relieve pressure inside the brake lines.
Step 4: Loosen Bleeder Bolts and Attach Tubing
Next, you need to use a wrench to loosen the bleeder screw/bolt. After this, place plastic tubing over the opening of the brake line and attach it to the bleeder valve using a wrench. The tubing should be long enough so that you can position yourself comfortably away from the car.
Step 5: Have A Friend Apply Brakes
Next, get your friend to push down on the brake pedal several times. This will cause some fluid to come out of the line so that it can be flushed with fresh fluid.
Your friend needs to keep applying steady pressure so that every bit of old fluid is forced out of brake lines through the tubing and collected in the container.
Step 6: Clean the Bleeder Bolt
Now, your friend can stop applying pressure on the pedals. You need to take off the tubing and clean the bleeder bolt with a cleaning cloth or compressed air.
You’ll also need to apply some lubricant around the area where the line connects to the car so that you don’t have any problems tightening it later when you are finished.
Step 7: Replace the Old Brake Fluid with the New One
Now that the air has been removed from your brake lines, you can start replacing or adding new fluid.
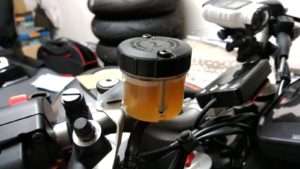
Flickr Image by Iwao
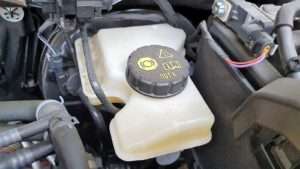
Remove the cap from the master cylinder reservoir and add fresh brake fluid slowly using a funnel while you keep the pedal pressed. This will cause pressure to build up in the reservoir and push out bubbles if they are present in your brake lines.
However, be careful not to cause the brake fluid level to rise above the maximum line. After you have added new brake fluid into your master cylinder reservoir, throw down the parking brake and wait for a few minutes.
The amount of fluid you need will depend on how much you flushed out using the tubing and by applying pressure to the pedal, but it should be roughly one quart.
Check for leaks by pouring a small amount of brake fluid on the spot where the line is connected to the car. Let it sit for a few minutes, and then wipe it off and check for leaks. If there are any leaks, tighten everything until the problem is fixed.
Step 8: Tighten and Secure the Bleeders
Next, use a wrench to tighten the bleeder bolts while still looking for air bubbles in the lines with your friend’s help. This will ensure that no air gets inside the lines again. Finally, secure the brake line to the car using clutch-type clamps.
Step 9: Repeat the Process for Every Wheel
Once you have successfully removed air from one wheel, you’ll need to repeat the same process for every other wheel. Only then will you be able to drive your car with confidence, knowing that both your brake lines and fluid are in good condition.
Important Note: Air drawn in through old and degraded brake lines can lead to a situation where brakes fail to engage when needed. This can be especially dangerous if you are driving on a busy street or highway. Because of this, you need to get the air bubbles out of the brake lines.
Step 10: Fill Your Brake Fluid Reservoir
The last thing you need to do is check all your brake lines once again. This is to make sure that there are no leaks causing air bubbles inside the lines. Finally, you need to add brake fluid to your reservoir so that it refills and you don’t have any problems later on.
Step 11: Go for A Test Drive
Now that all the air is removed from your brake system, you can go for a test drive. After you come back, check all your wheel cylinders to make sure that they are full of fluid. If there is any air in the system, repeat these steps until your brake lines are fully functional.
Remove the cap from the master cylinder reservoir and add fresh brake fluid slowly using a funnel while you keep the pedal pressed. This will cause pressure to build up in the reservoir and push out bubbles if they are present in your brake lines.
However, be careful not to cause the brake fluid level to rise above the maximum line. After you have added new brake fluid into your master cylinder reservoir, throw down the parking brake and wait for a few minutes.
The amount of fluid you need will depend on how much you flushed out using the tubing and by applying pressure to the pedal, but it should be roughly one quart.
Check for leaks by pouring a small amount of brake fluid on the spot where the line is connected to the car. Let it sit for a few minutes, and then wipe it off and check for leaks. If there are any leaks, tighten everything until the problem is fixed.
Tips on how not to mess up when bleeding your brakes
Here are some tips for preventing any mistakes when removing air from your brakes:
- Have someone test your brake pedal after every few bleeds to make sure that nothing is wrong.
- Clean all bolts and other parts before you start the process.
- Avoid using any sharp objects or grease inside the brake system, and stick to only the special brake spray lubricant that’s recommended by the manufacturer or your auto mechanic.
- Keep a record of every single bleed step you performed. This will help you remember how much fluid you have added and will also reveal any air bubbles inside the system in case they show up as a result of any mistake you might have made.
- Do not underestimate the importance of this task and have a professional do it for you if possible. However, if you believe that you are capable enough after reading up on how to remove air from the brake, then you can give it a try.
FAQs
Q. What Are the Causes of Air Bubbles in Brake Lines?
Air bubbles in brake lines can be caused by the following;
- Old and degraded brake lines
- Grease or other lubricants present in a vehicle’s brake system
- The fluid that was put in when the brake lines were not clamped
- Lack of lubricant or fluid on the rubber seals used
- The use of sharp objects such as screwdrivers during the bleeding process
- Leaking air compressor
- Improper installation of a new brake line
Q. What Can You Do to Prevent Air Bubbles in Your Brake Lines?
Follow the tips listed below to avoid air bubbles in your brake lines:
- Keep the fluid used to fill your brake system clean and free from any dirt, grease, or other debris.
- Make sure all of your seals are in good condition by replacing them if they show signs of aging.
- Clean off any lubricant before you connect a new brake line to a reservoir or master cylinder.
- Always clamp your brake lines before the bleeding process is performed so that air does not get into the system again.
- Remember to use only a small amount of fluid when filling your wheel cylinders, and remember to add it slowly, using the same method you used for bleeding.
Q. How Much Brake Fluid Will I Need to Replace?
You will need about 1 to 2 quarts of brake fluid to replace what you have lost because of air bubbles in your brake lines. The exact amount of brake fluid you need to replace depends on the type of car you have.
Q. How Do You Get the Air Out of Brake Lines without Bleeding?
There are several ways to get air bubbles out of your brake lines without having to do a complete brake line bleed:
- Add more Brake Fluid to the system regularly.
- Install a tee and double-check all your valves to stop air from entering the lines again.
- Replace old seals and worn-out brake lines.
- Clean Brake lines with Brake Spray Lubricant.
Final Words
With this handy guide and some patience, you should be able to get the air out of your brake lines. It can seem daunting at first, but it’s not that hard if you follow the step-by-step guide discussed above.
If you find that removing air from your brakes is a little too much for you, simply bring your vehicle to a local auto shop and have professional mechanics do the job. The small cost is worth the added peace of mind that comes with trusting someone experienced.
Thanks for reading our blog post on how to get the air out of brake lines without bleeding. Have you tried any of these tips? Let us know what worked best for you by leaving a comment below.

My name is Tom Harris, founder of this blog. I’m a mechanical engineer with 20 years of experience in the automotive industry. I’m here to help you with your vehicle’s problems, easy fixes and share my insights and experience so that you can enjoy your rides more.
Very insightful article, Tom!
Found that your process was easy and simple to follow. Before reading your post, I usually use the vacuum to pull air out from my car brake lines.
Your tips also are helpful for me. Thanks for sharing.
But, I have a question: how often should I bleed the brake lines?
TIA.